All FAQs
What Does DFT Mean?
When it comes to protective coatings, DFT, or Dry Film Thickness, is one of the most important measurements to get right. Whether you’re coating steel, concrete, or any other substrate, achieving the correct DFT ensures the coating system performs as intended — providing long-term protection against corrosion, wear, and environmental exposure.
At New Guard Coatings, we help customers understand and achieve the right DFT for every project, from industrial steelwork and marine structures to building maintenance and flooring systems.
What Is Dry Film Thickness (DFT)?
Dry Film Thickness refers to the thickness of a coating layer once it has fully dried or cured. It’s typically measured in microns (µm) and determines how much material remains on the surface after the solvent or water has evaporated.
Getting the correct DFT is crucial for ensuring a coating’s performance, durability, and compliance with international standards such as ISO 12944, NORSOK, and manufacturer specifications.
Why Is DFT Important?
Applying a coating too thin or too thick can lead to costly problems down the line.
-
Too thin: The surface may not be adequately protected against corrosion, chemicals, or abrasion.
-
Too thick: The coating could crack, blister, or fail to cure properly — all of which reduce lifespan and protection.
By applying the correct DFT, you guarantee the coating system performs as designed, providing maximum protection and cost-effective longevity.
How Is DFT Measured?
Measuring DFT accurately requires specialist equipment. Common tools include:
-
Magnetic gauges – Used for non-destructive testing on ferrous substrates such as steel.
-
Eddy current gauges – Suitable for non-ferrous metals like aluminium.
-
Ultrasonic gauges – Used for coatings on non-metallic substrates such as concrete, plastic, or wood.
Professionals often perform multiple readings across the surface to calculate an average DFT, ensuring consistency and compliance with the project specification.
DFT and Coating Specifications
Every coating product has a recommended DFT range provided by the manufacturer. For example, a zinc-rich primer might specify a DFT of 50–75 µm, while a high-build epoxy could require 200–400 µm.
At New Guard Coatings, our team works closely with clients to help them select coating systems that meet their performance requirements — and to ensure the correct film thickness is achieved for optimal protection.
Wet Film Thickness vs. Dry Film Thickness
Before a coating dries, it’s often measured as Wet Film Thickness (WFT). As the coating cures, the solvents or water evaporate, reducing its thickness to the final DFT.
To calculate the expected DFT from WFT, applicators use the formula:
DFT = WFT × Volume Solids (%) / 100
Understanding this relationship helps applicators apply coatings correctly the first time, reducing waste and rework.
Achieving the Correct DFT with New Guard Coatings
With decades of experience supplying industrial and protective coatings across the UK, New Guard Coatings provides full technical support to help you meet project specifications. Whether you’re working on steel structures, storage tanks, or concrete flooring, our experts can guide you on the correct coating systems, DFT targets, and application methods.
Contact Our Team
If you need assistance with DFT calculations or coating system selection, contact our technical team today.
What is Induction Time?
When working with two-component coatings such as epoxies or polyurethanes, understanding induction time is essential for achieving proper film formation and long-term performance. This step is often overlooked, but it plays a crucial role in ensuring that the coating cures correctly and adheres effectively to the substrate.
At New Guard Coatings, we help customers understand the importance of induction time, ensuring coatings are mixed, applied, and cured in line with manufacturer specifications for reliable results every time.
What Is Induction Time?
Induction time, sometimes called sweat-in time, is the period after mixing the two components of a coating (usually the base and hardener) during which the mixture must stand before application. This waiting period allows the necessary chemical reactions to begin, ensuring that the coating performs as intended once applied.
During this time, the materials start to react and partially cure, creating the molecular structure that will later form the coating’s full film strength and protective properties.
Why Is Induction Time Important?
Applying a coating before it has completed its induction time can cause several issues:
-
Poor adhesion to the substrate
-
Incomplete curing or soft films
-
Reduced chemical and corrosion resistance
-
Surface defects such as pinholing or poor gloss
On the other hand, waiting too long past the specified induction time can lead to the coating thickening, making it difficult to apply or even causing it to gel in the pot.
Following the recommended induction time ensures the product reaches the correct consistency and chemical readiness before application, resulting in a durable and even finish.
Typical Induction Times
Induction times vary between products, but most range from 5 to 30 minutes. The exact time depends on factors such as:
-
Product type (epoxy, polyurethane, etc.)
-
Ambient temperature – higher temperatures can shorten induction time
-
Mixing ratio and reactivity of components
Always refer to the product’s technical data sheet (TDS) to confirm the correct induction time before use.
How to Measure and Observe Induction Time
Once the coating components are mixed thoroughly, simply start a timer for the specified induction period. It’s best to stir the mixture occasionally during this time to maintain uniformity. After the induction time has elapsed, the product is ready to apply — but always within its specified pot life window.
Induction Time vs. Pot Life
While these terms are often mentioned together, they refer to different stages of the coating’s usable life.
-
Induction time: The waiting period immediately after mixing before the coating can be applied.
-
Pot life: The total time the mixed coating remains usable before it begins to thicken or harden.
Observing both is critical to achieving the right film formation and performance.
Ensuring Correct Application with New Guard Coatings
At New Guard Coatings, we supply high-performance coating systems that require precise mixing and application to achieve full protection. Our technical team offers detailed product guidance, including mixing ratios, induction times, and application methods to help you achieve optimal results.
Whether you’re working on structural steel, tanks, or concrete floors, we ensure that every coating performs to specification, every time.
Contact Our Team
If you need advice on coating application, product selection, or technical data, get in touch with our experts today.
What is Pot Life?
When working with two-component coating systems such as epoxies, polyurethanes, or polysiloxanes, understanding pot life is essential. Pot life determines how long a mixed coating remains usable before it begins to harden, thicken, or lose its ability to apply correctly.
At New Guard Coatings, we help applicators, contractors, and manufacturers understand how to manage pot life effectively to ensure coating systems perform as designed.
What Does Pot Life Mean?
Pot life refers to the amount of time a coating mixture remains workable after the base and hardener have been combined. It begins the moment the two components are mixed and ends when the product becomes too thick or viscous to apply properly.
Manufacturers specify pot life based on controlled laboratory conditions, usually at 23°C (73°F). In real-world environments, this time can vary depending on factors such as temperature, humidity, and batch size.
Why Is Pot Life Important?
Understanding and respecting pot life is critical for achieving a high-quality coating finish and long-term protection. Using the coating after its pot life has expired can lead to:
-
Poor adhesion and incomplete curing
-
Uneven film formation
-
Reduced chemical and corrosion resistance
-
Surface defects such as bubbles, pinholes, or brush marks
By keeping within the specified pot life, applicators can ensure the coating flows, levels, and cures correctly.
Factors That Affect Pot Life
Several variables influence the length of a coating’s pot life:
-
Temperature: Higher temperatures speed up the chemical reaction, reducing pot life. Lower temperatures slow it down, extending the usable time.
-
Volume of mixture: Larger batches generate more heat during the chemical reaction, which can shorten pot life.
-
Product type: Epoxies typically have shorter pot lives than polyurethanes or polysiloxanes.
-
Mixing accuracy: Incorrect ratios or incomplete mixing can alter pot life and affect performance.
Typical Pot Life Durations
Pot life can range from 20 minutes to several hours, depending on the coating system. Always check the product’s Technical Data Sheet (TDS) for specific guidance. It’s good practice to only mix what can be used within the given time to prevent material waste.
How to Tell When Pot Life Has Expired
As the coating approaches the end of its pot life, it may begin to thicken, heat up, or lose its smooth flow characteristics. Once it becomes noticeably more viscous or difficult to apply, it should be discarded. Continuing to use expired material can compromise coating performance and appearance.
Pot Life vs. Induction Time
Although both terms relate to two-component coatings, they describe different phases:
-
Induction time: The waiting period after mixing before the coating is ready to use.
-
Pot life: The total period the mixed coating remains usable before it starts to harden.
Observing both correctly ensures the coating performs exactly as intended.
Managing Pot Life Effectively with New Guard Coatings
At New Guard Coatings, our team provides expert support to help you select and apply coatings within the correct parameters. We supply a wide range of two-component coating systems from leading brands and ensure you have the technical data needed to manage pot life accurately.
Whether you’re applying coatings to steel structures, concrete floors, or machinery, understanding pot life helps deliver consistent, long-lasting protection.
Contact Our Team
For product advice, pot life guidance, or application support, get in touch with our technical experts today.
📞 Call: +44 (0)1904 401 479
How Overcoating Time Works
When applying multi-coat systems such as primers, intermediates, and topcoats, understanding overcoating time is essential for achieving proper adhesion and long-term durability. Each coating layer must be applied within a specific window to ensure the next layer bonds correctly and the system performs as designed.
At New Guard Coatings, we help customers understand and manage overcoating intervals to ensure every project meets specification and delivers lasting protection.
What Is Overcoating Time?
Overcoating time refers to the recommended time frame between applying one coat and the next. This allows the first coat to cure to the right level before applying another layer, ensuring strong intercoat adhesion and optimal coating performance.
If the next coat is applied too soon, it can trap solvents and lead to defects. If it’s applied too late, the surface may have cured too much for proper bonding, requiring sanding or surface preparation before recoating.
Why Overcoating Time Matters
Getting the overcoating time right ensures the coating system forms a continuous, well-bonded film. Ignoring it can lead to issues such as:
-
Poor adhesion between coats
-
Solvent entrapment, resulting in blistering or soft films
-
Cracking or delamination over time
-
Premature coating failure
By following the manufacturer’s specified overcoating intervals, you ensure each layer performs as part of a unified system, providing reliable corrosion and environmental protection.
Minimum and Maximum Overcoating Times
Most coatings specify both a minimum and maximum overcoating time:
-
Minimum overcoating time: The shortest period you must wait before applying the next coat. This allows sufficient solvent evaporation and initial cure.
-
Maximum overcoating time: The longest period you can wait before the surface becomes too hard or glossy for proper adhesion. Beyond this, surface preparation such as light abrasion or solvent wiping may be required before recoating.
These times vary depending on temperature, humidity, and film thickness, so always check the product’s Technical Data Sheet (TDS) for the exact guidance.
How Conditions Affect Overcoating Time
Environmental conditions play a major role in determining overcoating intervals:
-
Temperature: Higher temperatures accelerate curing, shortening both minimum and maximum overcoating times.
-
Humidity: High humidity can slow solvent evaporation, increasing minimum overcoating time.
-
Coating thickness: Thicker films take longer to cure, extending the overcoating window.
Monitoring site conditions helps ensure coatings are applied at the right stage for strong intercoat adhesion.
What Happens If Overcoating Time Is Exceeded?
If the maximum overcoating time has passed, the surface may have lost its chemical reactivity. In this case, additional surface preparation is required to create a mechanical key for the next coat. This may involve:
-
Light abrasion or sanding to roughen the surface
-
Solvent wiping to remove contaminants or oxidation
-
Re-priming if adhesion cannot be restored
Following these steps prevents delamination and ensures long-term coating integrity.
How New Guard Coatings Can Help
At New Guard Coatings, our technical experts provide full support on product selection, overcoating intervals, and application techniques. Whether you’re working with steel structures, machinery, or flooring systems, we’ll help ensure every layer of your coating system bonds correctly and performs to specification.
Contact Our Team
Need help understanding overcoating times or selecting the right coating system? Speak to our technical team today.
How to Work Out Paint Coverage
Accurately calculating paint coverage is essential before starting any coating project. Whether you’re coating steel, concrete, wood, or machinery, knowing how much product you need helps ensure proper protection, reduce waste, and control project costs.
At New Guard Coatings, we help customers determine paint quantities and coverage rates for all types of industrial and protective coatings, ensuring every job is completed efficiently and to specification.
What Does Paint Coverage Mean?
Paint coverage refers to the area a specific quantity of paint can cover at a certain film thickness. It’s usually measured in square metres per litre (m²/L) and varies depending on the coating type, surface profile, and application method.
Every coating product includes a theoretical coverage rate in its Technical Data Sheet (TDS), based on an even application and ideal conditions. However, actual coverage achieved on-site is often lower due to application losses, surface roughness, and overspray.
Why Paint Coverage Is Important
Knowing how to calculate paint coverage helps you:
-
Order the correct amount of product for your project
-
Ensure correct film thickness (DFT) for long-term protection
-
Minimise material waste and overspend
-
Plan coating application efficiently
Applying too little paint can leave surfaces under-protected, while applying too much can lead to runs, cracking, or excessive drying times.
How to Calculate Theoretical Paint Coverage
Theoretical coverage can be calculated using this formula:
Theoretical Coverage (m²/L) = (10 × Volume Solids %) / Dry Film Thickness (µm)
For example, if a coating has a volume solids of 60% and is applied at a DFT of 100 microns:
(10 × 60) / 100 = 6 m²/L
This means 1 litre of paint will theoretically cover 6 square metres at 100 microns DFT under ideal conditions.
Allowing for Practical Losses
In real-world applications, you’ll always experience some paint loss due to overspray, uneven surfaces, and absorption. To account for this, apply a loss factor based on your application method:
-
Airless spray: 20–30% loss
-
Brush or roller: 10–20% loss
-
Complex steelwork or irregular surfaces: 30–50% loss
So, if your theoretical coverage is 6 m²/L using airless spray, your practical coverage might be closer to 4.5–5 m²/L.
Other Factors That Affect Paint Coverage
Several site conditions can also influence paint coverage rates:
-
Surface profile and roughness: Coatings on abrasive-blasted steel require more paint to fill the surface peaks and valleys.
-
Porosity: Concrete, timber, and aged substrates absorb more product on the first coat.
-
Temperature and humidity: These can affect paint viscosity, flow, and overspray levels.
-
Application skill: Experienced applicators generally achieve better consistency and less waste.
Using Wet Film Thickness to Check Coverage
During application, you can use a Wet Film Thickness (WFT) gauge to ensure the coating is applied at the correct thickness to achieve the desired DFT once cured.
Use the formula:
WFT = DFT × 100 / Volume Solids (%)
This helps confirm the coating is being applied evenly and at the correct rate for full coverage and protection.
How New Guard Coatings Can Help
At New Guard Coatings, we provide expert guidance to help you calculate paint quantities and coverage for any project. Our team can assist with:
-
Paint coverage estimates and DFT calculations
-
Surface preparation and application advice
-
Selecting the right product for your environment and substrate
We work closely with contractors, applicators, and specifiers to ensure every coating system is applied accurately and performs as designed.
Contact Our Team
For help working out paint coverage or choosing the right coating for your project, contact our technical experts today.
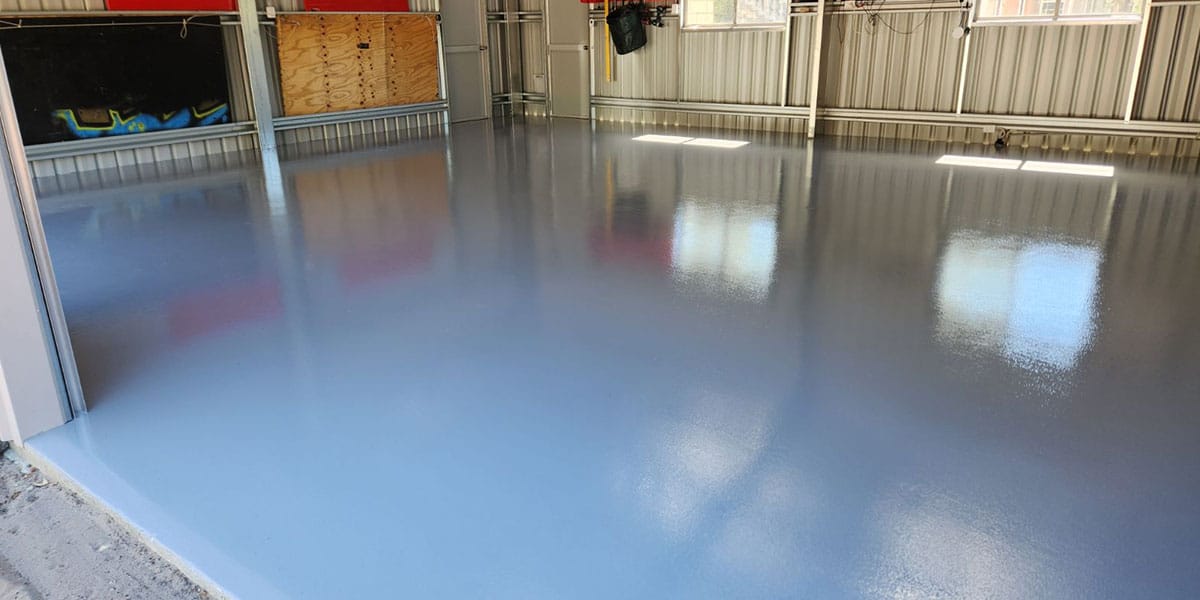
How to Paint a Concrete Floor
Painting a concrete floor can completely transform a space, providing a clean, durable, and professional finish that’s easy to maintain. Whether it’s a workshop, warehouse, garage, or commercial area, the right coating system can protect the surface from wear, chemicals, and moisture while improving appearance and safety.
At New Guard Coatings, we supply a wide range of concrete floor coatings suitable for industrial and commercial environments, along with expert advice on surface preparation and application.
Why Paint a Concrete Floor?
Bare concrete is porous and prone to dusting, staining, and surface damage. Applying a high-quality floor coating provides:
-
Durability: Resistance to abrasion, impact, and heavy foot or vehicle traffic
-
Chemical protection: Shields against oils, fuels, and cleaning agents
-
Ease of cleaning: Smooth, dust-free finish that’s simple to maintain
-
Improved appearance: Brightens up the space and can include safety markings or colour zoning
Step 1: Assess the Floor Condition
Before painting, inspect the concrete to ensure it’s clean, dry, and structurally sound. Look for:
-
Oil or grease contamination
-
Cracks or surface damage
-
Moisture issues or damp patches
-
Existing coatings that may need removal
New concrete should be allowed to cure for at least 28 days before coating.
Step 2: Surface Preparation
Surface preparation is the most important stage for a long-lasting finish. The concrete should be free from contaminants and have an open, textured surface for good adhesion. Recommended preparation methods include:
-
Diamond grinding or shot blasting: Removes laitance and provides a profile for coating adhesion.
-
Acid etching (for smaller areas): Can be used to lightly roughen the surface, though mechanical methods are preferred for industrial use.
-
Vacuuming and cleaning: Remove all dust and debris before coating.
If oil or grease stains are present, clean using a degreaser and allow the surface to dry completely.
Step 3: Check for Moisture
Moisture is a common cause of coating failure on concrete floors. Conduct a moisture test (such as a plastic sheet test) to ensure there’s no rising damp or trapped water. If moisture is present, a moisture-tolerant primer may be required.
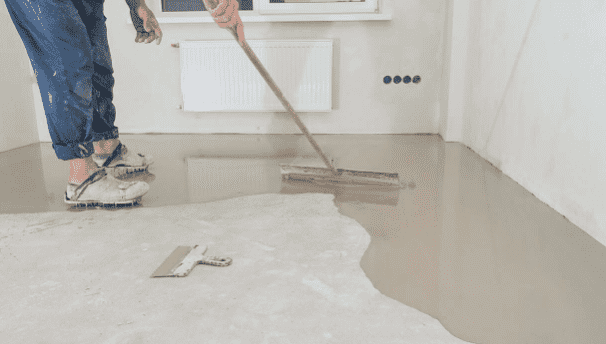
Step 4: Apply the Primer
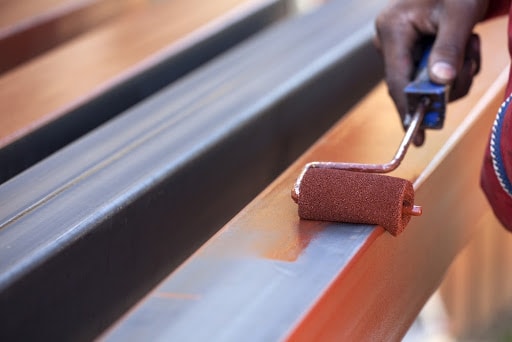
Most concrete floor systems begin with a penetrating primer designed to seal the surface and promote adhesion. Apply the primer evenly using a roller or brush, working into all edges and corners.
Allow the primer to dry fully before applying the topcoat. Drying times vary depending on temperature and humidity, so always refer to the product’s Technical Data Sheet (TDS).
Step 5: Apply the Floor Coating
Once the primer has cured, apply the chosen epoxy or polyurethane floor coating. Mix both components thoroughly according to the manufacturer’s instructions and respect the induction time and pot life.
Apply the first coat using a roller, ensuring even coverage. For best results, apply a second coat at 90 degrees to the first once the recommended overcoating time has passed.
For slip resistance, broadcast anti-slip aggregate onto the first coat while wet, then seal it with a final coat.
Step 6: Allow to Cure Properly
Curing times depend on temperature, humidity, and product type. Most floor coatings can be walked on within 24 hours and returned to full service after 5–7 days. Avoid placing heavy equipment or vehicles on the floor until fully cured.
Common Mistakes to Avoid
-
Skipping surface preparation
-
Coating over damp concrete
-
Ignoring induction or overcoating times
-
Applying too thickly or too soon between coats
Following the correct process ensures a long-lasting, professional finish that will stand up to daily use.
Recommended Floor Coatings from New Guard Coatings
At New Guard Coatings, we supply high-performance floor coatings including:
-
Epoxy floor paints for heavy-duty protection
-
Polyurethane coatings for chemical resistance and UV stability
-
Anti-slip systems for safety in wet or oily environments
-
Solvent-free options for low-odour, environmentally friendly projects
Our team can recommend the best product for your project based on usage, budget, and conditions.
Contact Our Team
For advice on painting concrete floors or selecting the right coating system, speak to our experts today.
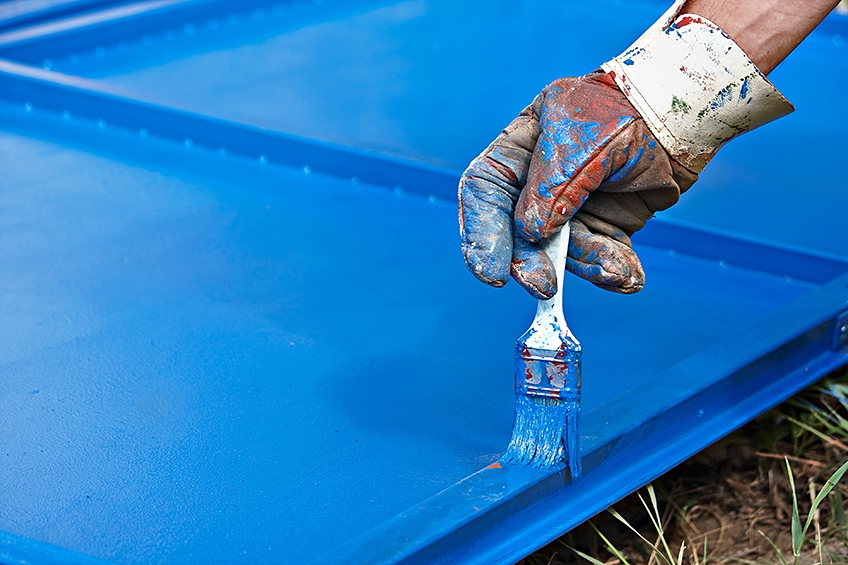
How to Paint Roofing and Cladding
Painting roofing and cladding is one of the most effective ways to restore, protect, and extend the life of a building’s exterior. Whether it’s metal cladding, industrial roofing sheets, or building façades, the right coating system can improve weather resistance, prevent corrosion, and transform the overall appearance of your property.
At New Guard Coatings, we supply a full range of roofing and cladding coatings designed to deliver long-term protection and durability, even in harsh industrial and coastal environments.
Why Paint Roofing and Cladding?
Over time, roofs and cladding are exposed to UV radiation, moisture, temperature changes, and pollution. Without maintenance, this leads to colour fading, chalking, corrosion, and general degradation. Painting these surfaces provides:
-
Corrosion protection: Shields metal from rust and weather damage
-
UV and colour stability: Keeps the surface looking newer for longer
-
Extended lifespan: Delays the need for full replacement
-
Improved energy efficiency: Light-coloured coatings reflect sunlight and reduce heat build-up
-
Enhanced appearance: Refreshes tired or faded panels for a professional finish
Step 1: Inspect and Prepare the Surface
Before painting, it’s essential to assess the condition of the roof or cladding. Look for signs of corrosion, flaking paint, chalking, or loose fasteners. Proper surface preparation is key to achieving lasting results.
Typical preparation steps include:
-
Cleaning: Remove dirt, grease, and debris using a pressure washer or detergent solution.
-
Rust removal: Mechanically clean rusted areas with a wire brush or abrasive blasting, then apply a rust converter or zinc phosphate primer.
-
Old coating removal: Any loose or flaking paint should be stripped back to a sound surface.
-
Rinsing and drying: Always allow the surface to dry completely before coating.
Step 2: Apply the Primer
Priming is essential for ensuring good adhesion and corrosion resistance, especially on bare or previously weathered metal. The type of primer depends on the substrate:
-
Galvanised steel: Use an etch primer or two-component epoxy primer for strong adhesion.
-
Bare steel: Apply a zinc-rich epoxy or anti-corrosive primer.
-
Previously coated surfaces: Use a high-build adhesion primer suitable for overcoating existing finishes.
Allow the primer to dry as specified on the Technical Data Sheet (TDS) before applying the next coat.
Step 3: Choose the Right Topcoat
Selecting the correct topcoat depends on exposure conditions, colour requirements, and desired finish. Common choices include:
-
Acrylic roof coatings: Flexible and UV-resistant, ideal for general maintenance.
-
Polyurethane coatings: Highly durable and resistant to UV degradation and chemicals.
-
Silicone-modified coatings: Excellent water resistance and longevity for exposed roofs.
At New Guard Coatings, we supply Jotun, Hempel, and other premium brands that meet international performance standards for roofing and cladding protection.
Step 4: Application Method
Roofing and cladding coatings can be applied by airless spray, brush, or roller. For large surfaces, airless spraying offers the best efficiency and uniform finish.
Apply the coating in even passes, overlapping each section slightly to avoid streaks or missed areas. Most systems require two coats for full coverage and durability.
Always respect the recommended overcoating times and film thickness (DFT) for best results.
Step 5: Allow to Cure
After the final coat, allow the system to cure fully before exposure to rain or heavy conditions. Curing times vary based on the product type, temperature, and humidity.
Avoid applying coatings in poor weather or direct sunlight, as this can affect adhesion and drying.
Common Mistakes to Avoid
-
Painting over dirty or rusted surfaces
-
Ignoring primer requirements for different metals
-
Applying coatings too thickly or too soon between coats
-
Coating during damp or windy conditions
Recommended Products for Roofing and Cladding
At New Guard Coatings, we offer a range of specialist products for roof and cladding protection, including:
-
Jotun Penguard Primer – anti-corrosive epoxy primer for metal substrates
-
Jotun Hardtop Flexi – polyurethane topcoat offering excellent flexibility and UV resistance
-
Jotun Roofcoat – single-pack acrylic coating ideal for maintenance and refurbishment
-
Rust converters and surface prep cleaners – to restore and stabilise aged metal
Our technical team can recommend the best system for your project based on substrate, environment, and desired longevity.
Contact Our Team
For expert advice on painting roofing and cladding, or to select the right coating system for your project, speak to our team today.
What Paint do I need for My Warehouse Floor?
When choosing the right paint or coating for a warehouse floor, it’s essential to consider the type of surface, level of traffic, and the environment the coating will face. A warehouse floor must withstand constant movement from forklifts, pallets, and foot traffic, while also resisting dust, oil, and chemical spills.
At New Guard Coatings, we supply a wide range of high-performance floor coatings designed to protect and extend the life of concrete floors in industrial and commercial environments.
Understanding Your Warehouse Floor Needs
Before selecting a product, assess how your warehouse operates:
-
Light Duty Areas: Storage zones or walkways with minimal traffic.
-
Medium Duty Areas: Areas with trolleys, pallet trucks, or light forklift traffic.
-
Heavy Duty Areas: Constant forklift movement, heavy loads, or chemical exposure.
Each area may require a different coating type to ensure performance and longevity.
The Best Paint Types for Warehouse Floors
1. Epoxy Floor Coatings
Epoxy coatings are the most popular choice for warehouse floors due to their excellent adhesion, durability, and chemical resistance. They provide a smooth, hard-wearing finish that can handle heavy traffic and resist oil, fuel, and cleaning chemicals.
Epoxies are usually available as two-component systems, meaning a resin and hardener are mixed before application.
2. Polyurethane Floor Coatings
Polyurethane (PU) coatings are flexible, UV-resistant, and ideal for areas where the floor is exposed to sunlight or temperature fluctuations. They offer a slightly softer finish than epoxy, which helps absorb impact and vibration. PU topcoats are often used over epoxy bases for enhanced protection and gloss retention.
3. High-Build Coatings
High-build epoxy or polyurethane systems are designed for maximum durability. They create thicker protective films that resist abrasion and impact, making them ideal for heavy-duty areas such as logistics zones, production areas, and loading bays.
4. Anti-Slip Coatings
Safety is crucial in any warehouse. Adding a non-slip aggregate or selecting an anti-slip coating helps prevent accidents in high-traffic or wet areas.
5. Solvent-Free and Low-VOC Options
For enclosed warehouses or sensitive environments, solvent-free or low-VOC coatings are a great choice. These reduce odours and environmental impact while maintaining performance.
Surface Preparation is Key
The success of any floor coating depends on proper preparation. Concrete must be clean, dry, and free from oil, dust, or existing loose paint. In many cases, mechanical preparation such as grinding or shot blasting is recommended to create the ideal surface profile for adhesion.
Once the surface is prepared, it’s important to apply the correct primer before your topcoat. Primers seal the surface and improve adhesion, helping the coating system perform for years to come.
How to Calculate Coverage
Most floor coatings specify coverage in square metres per litre. As a guide:
-
Light duty coatings: 6–8 m² per litre
-
High-build coatings: 3–5 m² per litre
-
Always check the manufacturer’s data sheet for the correct wet film thickness and expected dry film thickness (DFT).
At New Guard Coatings, we can help you calculate how much product you’ll need to achieve the correct build and performance for your warehouse floor.
Choosing the Right Product
Selecting the right system comes down to balancing performance, budget, and maintenance expectations. A two-pack epoxy floor coating often provides the best all-round protection for warehouses, but in some cases, a polyurethane or hybrid system may be more suitable.
Our technical team can recommend coating systems from trusted brands such as Jotun, PPG, and Teknos, ensuring compliance with industry standards and long-term durability.
Protect Your Warehouse Floor with New Guard Coatings
With decades of experience supplying coatings to industrial and commercial clients across the UK and beyond, New Guard Coatings can help you find the perfect system for your warehouse. Whether you need a fast-curing epoxy, a high-build polyurethane, or an anti-slip finish, our experts can advise on the right solution for your environment.
Contact our team today to discuss your project and find the most suitable coating for your warehouse floor.
How to Apply Non-Slip Paint to a Workshop Floor
Applying non slip paint to a workshop floor improves safety, reduces the risk of accidents, and creates a more professional working environment. The key is preparing the surface properly and using the correct type of coating for the area’s usage and traffic.
Before painting, make sure the floor is completely clean and free from oil, dust, and grease. Any existing coatings or loose material should be removed by mechanical abrasion or shot blasting. This ensures the coating adheres correctly and lasts longer.
Once prepared, apply a suitable primer to promote adhesion, particularly if the substrate is bare concrete. Mix the non slip paint thoroughly and apply evenly using a roller or brush. While the first coat is still wet, broadcast anti-slip aggregate across the surface, then allow it to dry fully. Once cured, seal the surface with a topcoat for added durability and chemical resistance.
Maintaining a non slip surface requires regular cleaning and inspection. Over time, reapplying the top layer will restore traction and prolong protection.
How to Paint Factory Walls for a Clean and Professional Finish
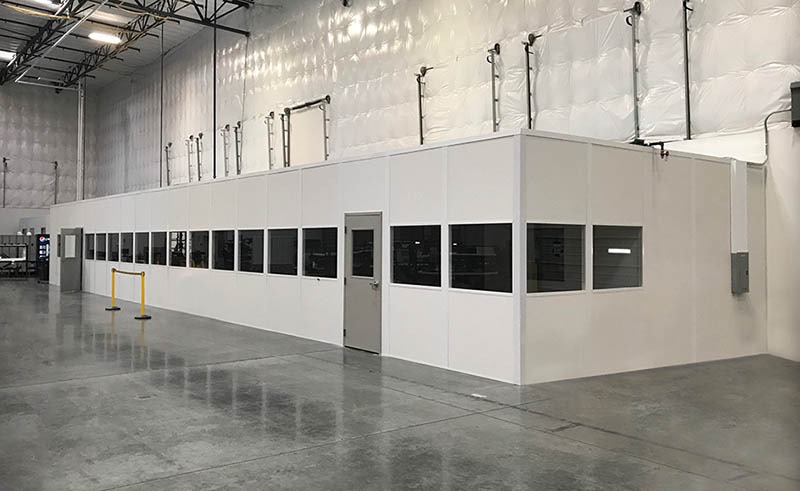
Painting factory walls is not just about appearance. A durable coating also protects against dirt, moisture, and chemical exposure. Proper preparation and product selection ensure long-lasting results.
Start by inspecting the surface for cracks, flaking paint, or contamination. Clean the walls with an appropriate degreaser or detergent to remove oil and dust. If mould or algae are present, treat the surface with a biocidal wash and allow it to dry thoroughly.
Once clean, repair any damage and sand rough areas smooth. Apply a suitable primer to promote adhesion, particularly on previously painted or porous surfaces. Then apply two coats of a high-performance factory wall coating using a roller or airless sprayer.
A bright, reflective finish can help improve lighting conditions within the building, reducing energy use. Regular cleaning will also help maintain the coating’s appearance and longevity.
How to Seal Bare Metal Before Painting
Bare metal surfaces are highly susceptible to corrosion if left unprotected. Sealing them properly before painting prevents rust, improves coating adhesion, and extends the lifespan of the structure.
Begin by cleaning the metal thoroughly to remove rust, oil, and contaminants. Mechanical abrasion, shot blasting, or sanding will help achieve a clean surface profile for better adhesion. Once clean, wipe the area with a degreaser and ensure it is completely dry.
Next, apply a high-quality metal sealer or primer. This creates a barrier that prevents moisture and oxygen from reaching the metal surface. Allow the primer to dry according to the manufacturer’s guidance before applying a topcoat.
Regular inspection and maintenance will ensure the protective system continues to perform, particularly in outdoor or industrial environments exposed to harsh weather or chemicals.
How to Prepare Concrete Floors for Industrial Coatings
A successful floor coating application begins with proper surface preparation. Without it, even the best coating systems may fail prematurely.
Start by assessing the condition of the concrete. Remove oil, grease, dust, or existing coatings using a combination of degreasing, mechanical grinding, or shot blasting. Any cracks or holes should be repaired using an epoxy mortar or suitable filler.
After preparation, ensure the surface is dry and free from contaminants. Apply a primer to promote adhesion, particularly on porous concrete. Once cured, follow with the chosen coating system in two or more coats for optimal coverage.
Temperature and humidity play an important role in curing. Always follow product-specific drying times to ensure the coating performs as intended.
How to Waterproof Industrial Floors and Walls

Waterproofing industrial areas helps prevent structural damage caused by moisture ingress and chemical attack. It is particularly important in factories, basements, and areas subject to cleaning or liquid spills.
Begin by preparing the surface to ensure it is clean, dry, and free from oil or debris. Cracks should be repaired and joints sealed. Apply a suitable primer to improve adhesion, then apply the waterproof coating evenly using a roller, brush, or sprayer.
For extra protection, consider multiple layers or reinforcing membranes in high-risk areas such as corners or drains. Allow adequate drying time between coats and ensure the final layer is fully cured before exposing it to moisture.
Regular inspection will help identify early signs of wear or peeling. Prompt maintenance ensures the waterproofing system continues to perform effectively for years.
How to Maintain Painted Machinery and Equipment
Maintaining painted machinery ensures long-term protection against corrosion, oil, and chemical exposure while preserving a professional appearance.
Regular inspection is essential. Check for signs of peeling, rust, or impact damage. Clean surfaces frequently to remove dirt, grease, and contaminants that could compromise the coating.
When touch-ups are required, lightly abrade the affected area, clean thoroughly, and apply matching touch-up paint. Avoid painting over oil or rust, as this can cause premature failure.
Repainting may be necessary for equipment operating in harsh or high-temperature environments. Proper preparation and the correct coating system will ensure lasting performance and minimal downtime.
How to Recoat a Worn Concrete Floor

Over time, industrial concrete floors can show signs of wear, chipping, or chemical damage. Recoating restores appearance, improves durability, and prevents further deterioration.
The first step is to assess the floor’s current condition. Any loose or flaking coating must be removed by mechanical means. Clean the surface thoroughly and repair cracks or holes using an appropriate repair compound.
Once the surface is smooth and dust-free, apply a primer suited to the substrate. Follow this with one or two coats of the selected floor coating, allowing sufficient drying time between applications.
Recoating at regular intervals keeps floors looking clean and professional while extending their lifespan and improving resistance to daily wear and chemicals.
How to Apply Coatings in Cold Weather

Applying coatings in cold conditions presents unique challenges. Low temperatures can slow curing times, affect adhesion, and alter viscosity. However, with proper planning, successful results are achievable.
Before starting, check the manufacturer’s temperature guidelines for both air and substrate. Avoid painting below the recommended limits, as moisture condensation may occur on cold surfaces.
Store materials in a warm environment prior to application to maintain optimal flow. Use heaters or temporary shelters where necessary to control temperature and humidity.
Always allow extended curing time between coats in colder weather. Monitoring conditions closely ensures the coating cures properly, maintaining adhesion and durability through winter months.
How to Clean and Maintain Industrial Floors

A clean industrial floor not only improves safety but also extends the lifespan of the coating system. Regular maintenance helps prevent build-up of oil, dust, and chemicals that can damage the surface.
Begin by sweeping or vacuuming the floor daily to remove loose debris. For deeper cleaning, use a neutral detergent and scrubber machine suited to the coating type. Avoid harsh solvents that may soften or dull the surface.
Inspect high-traffic areas regularly for wear. If the coating begins to fade or lose its anti-slip properties, consider reapplying a topcoat or clear sealer to restore protection.
Proper care ensures floors remain safe, hygienic, and visually appealing, even under heavy industrial use.
How to Prepare Surfaces Before Applying Protective Coatings
Surface preparation is the foundation of every successful coating application. Poor preparation is the leading cause of coating failure, regardless of the product’s quality.
The process begins with removing contaminants such as oil, grease, rust, and dirt. This can be achieved through mechanical cleaning, degreasing, or abrasive blasting depending on the substrate.
Once clean, the surface should be profiled to create a suitable anchor pattern for coating adhesion. Dust and debris must be completely removed before applying the primer.
Always check the surface’s dryness, temperature, and cleanliness prior to painting. Following preparation guidelines ensures that coatings bond effectively and perform as intended, providing lasting protection against corrosion and environmental exposure.
How to Apply Anti Corrosion Coatings to Structural Steel
Understanding Anti Corrosion Coatings
Anti corrosion coatings are designed to stop steel from deteriorating when exposed to moisture, chemicals, salt spray and industrial environments. These coatings act as a physical barrier that prevents water and oxygen from reaching the metal surface.
Preparing the Steel Surface
A clean and prepared surface is essential for long term protection. Most systems require abrasive blasting to remove mill scale, rust and previous coatings. In less demanding environments, mechanical preparation or power tools may be acceptable.
Priming the Substrate
After surface preparation, a compatible primer must be applied. Zinc rich primers, epoxy primers and specialist anti corrosion primers offer varying levels of durability depending on the environment.
Building the Coating System
Once primed, the steel is usually protected with intermediate and topcoats. Epoxies and polyurethanes are common choices because they provide long lasting performance and strong resistance to chemicals and weathering.
Ensuring Correct Dry Film Thickness
Each layer must reach the correct thickness for lasting performance. Use a wet film gauge during application and a dry film thickness gauge once the coating is cured.
Need Expert Advice
If you want support in selecting or applying anti corrosion coatings for steel structures, speak with our technical team at
https://newguardcoatings.com/pages/contact
How to Choose the Right Primer for Any Surface

Why Primers Matter
Primers are the foundation of any coating system. They improve adhesion, seal porous surfaces, block stains and enhance durability.
Assessing the Surface Type
Different surfaces behave differently. Metal needs primers that protect against corrosion. Concrete requires primers that soak in and stabilise the surface. Wood benefits from primers that block sap and prevent tannin bleed.
Considering Environmental Conditions
External conditions such as humidity, temperature and exposure to chemicals influence the type of primer needed. Industrial environments usually demand stronger systems than domestic settings.
Matching Primer to Topcoat
Not all primers work with every topcoat. Epoxy primers work well with epoxy and polyurethane systems. Acrylic primers are better suited to water based topcoats.
Applying the Primer Correctly
Use the correct thickness, ensure sufficient drying time and avoid over application. Proper venting and temperature control improve performance.
Need Help Choosing a Primer
Our team can recommend the best primer for your project. Get in touch
https://newguardcoatings.com/pages/contact
How to Restore a Rusted Metal Surface Before Painting

Understanding Rust Development
Rust forms when steel reacts with oxygen and moisture. The longer rust remains untreated, the deeper it penetrates the metal surface.
Removing Loose Rust
Use wire brushes, power tools or abrasive blasting to remove all loose rust and scale. The cleaner the surface, the more effective the coating system will be.
Stabilising Remaining Rust
If rust cannot be fully removed, rust converters or specific epoxy primers can stabilise the surface and prevent further corrosion.
Cleaning and Degreasing
Thoroughly degrease the metal to eliminate oils and contaminants that can interfere with adhesion.
Rebuilding the Coating System
Apply a corrosion resistant primer followed by strong intermediate and topcoat layers. The thickness and product choice depend on the severity of the environment.
Speak With a Product Specialist
How to Safely Apply Solvent Based Coatings Indoors
Understanding Solvent Based Systems
Solvent based coatings contain chemicals that evaporate during curing. These coatings often offer excellent durability and chemical resistance.
Ventilation Requirements
Proper airflow is essential when applying these coatings indoors. Mechanical ventilation, extraction systems and open access points can reduce vapour concentration.
Using Protective Equipment
Wear respirators, gloves and safety glasses. Ensure all PPE follows local regulations and product guidance.
Monitoring Temperature and Humidity
Solvent based coatings cure best within specific temperature and humidity ranges. Poor conditions may cause slow drying or surface defects.
Managing Fire Risk
Solvent vapours can be flammable. Keep sparks, open flames and heat sources away from the work area.
Need Support With Indoor Safety Planning
How to Recoat an Existing Epoxy Floor

Inspecting the Existing Coating
Check for peeling, bubbling, chemical damage or gloss loss. Any defects must be repaired before recoating.
Cleaning and Degreasing
Remove dust, oils and contamination using industrial cleaners. A fully clean floor ensures strong adhesion.
Checking for Gloss
Most epoxy systems require the existing surface to be abraded. A high gloss surface will resist adhesion without proper mechanical preparation.
Applying the New Epoxy Layer
Once prepared, apply the new coat at the correct spread rate. Follow recommended curing times between coats.
Ensuring Long Term Durability
Allow the floor to fully cure before returning it to service, especially in heavy traffic environments.
Talk to the Technical Team
How to Reduce Slipperiness on Industrial Walkways
Identifying Slip Hazards
Smooth concrete, worn epoxy floors and areas exposed to water or oil can become slippery and unsafe.
Choosing an Anti Slip System
Anti slip coatings range from textured finishes to aggregate broadcast systems. The right option depends on foot traffic, vehicle traffic and cleaning requirements.
Preparing the Surface
A clean and dry surface is essential. Repair cracks, remove contaminants and ensure the floor is fully prepared.
Applying the Anti Slip Product
Apply coatings evenly and distribute aggregates consistently. Uneven application can lead to visible inconsistency and performance issues.
Testing the Finished Surface
Slip resistance should be tested once the coating has cured to ensure compliance with safety requirements.
Need Help Choosing the Right System
How to Paint Exterior Masonry in Industrial Settings

Understanding Masonry Conditions
Masonry absorbs moisture and can deteriorate if not coated correctly. Industrial environments increase exposure to pollutants and chemicals.
Cleaning and Preparing the Surface
Remove biological growth, loose material and surface contamination. High pressure washing is often necessary.
Choosing the Correct Masonry Coating
Breathability, weather resistance and durability vary between products. Some systems are ideal for harsh weather while others are suited to mild climates.
Application Guidelines
Apply at the recommended thickness and avoid painting in extreme temperatures. Most masonry coatings need dry weather for proper curing.
Maintaining the Coated Surface
Regular inspection and cleaning improve longevity and appearance.
Contact Us for Coating Recommendations
How to Coat Machinery for Long Term Protection
Why Machinery Needs Protective Coatings
Industrial machinery is exposed to oils, chemicals, abrasion and constant handling. Coatings protect surfaces and improve the lifespan of equipment.
Preparing the Substrate
Clean the machinery thoroughly to remove grease and dust. Mask any moving parts that should not be coated.
Selecting the Right Coating
Equipment coatings must be durable, chemical resistant and suitable for the operating temperature of the machinery.
Application and Drying
Use the correct application method such as spray or brush. Ensure adequate curing before the machinery is returned to operation.
Ongoing Maintenance
Inspect coated surfaces periodically for wear and damage.
Speak With a Coatings Specialist
How to Improve Chemical Resistance on Concrete Floors
How to Extend the Lifespan of Protective Coatings
Understanding Coating Wear Patterns
All coatings eventually show signs of wear, especially in areas exposed to foot traffic, UV light or harsh weather.
Routine Cleaning
Dirt and chemicals break down coatings faster. Regular cleaning helps maintain appearance and durability.
Scheduled Inspections
Look for early signs of blistering, cracking or thinning. Early intervention reduces long term repair costs.
Recoating Before Failure
Recoating a surface before complete failure prevents structural damage and reduces downtime.
Using the Right Products
Choosing a higher performing system for challenging environments will significantly extend lifespan.
Need Help Planning Maintenance
How to Maintain Coated Surfaces in Food Processing Facilities
Food processing facilities require coatings that are hygienic, durable, and resistant to cleaning chemicals. Maintaining these surfaces properly ensures ongoing compliance and performance.
Regular cleaning with appropriate non aggressive detergents helps prevent build up of grease and contaminants. Avoid abrasive tools that may scratch the surface or remove protective layers.
Inspect walls, ceilings, and floors frequently for early signs of wear or damage. Any breaches in the coating must be repaired quickly to prevent contamination or moisture ingress.
Maintaining correct environmental conditions also helps coatings last longer. Proper ventilation reduces condensation, which can contribute to coating deterioration over time.
How to Reduce Downtime During Industrial Painting Projects
Minimising downtime is essential for busy industrial environments. Planning and organising the painting work correctly ensures the job is completed efficiently while maintaining safety and coating performance.
Start by scheduling the project during periods of lower activity if possible. Prepare the surface in advance to shorten the actual application time. Fast curing or quick return to service coatings may be suitable if the environment allows.
Ensure proper ventilation and temperature control to speed up drying and curing times. Organising a clear workflow for preparation, application, and drying helps reduce disruption.
Communication with staff is key. Clear areas should be cordoned off to maintain safety and avoid unwanted contamination of the wet coating.
How to Paint Over Previously Coated Surfaces
Painting over an existing coating can save time and money, but only if the surface is properly assessed and prepared. Not all coatings are suitable for overcoating without preparation.
First, inspect the existing coating to determine if it is sound. Any loose, flaking, or blistering paint must be removed. Clean the surface thoroughly to eliminate grease, dust, and contaminants. Light abrasion will help create a profile for the new coating.
In some cases, compatibility testing may be needed. Apply a small test patch to check for reactions or poor adhesion. If the test is successful, proceed with applying the new coating according to guidelines.
Regular maintenance after recoating helps preserve the new finish and prevents premature failure.
How to Control Moisture Before Painting Concrete
Moisture is one of the leading causes of coating failure on concrete surfaces. Controlling moisture before painting ensures long-term adhesion and prevents blistering.
Begin by testing the floor for moisture using either a moisture meter or a plastic sheet test. If moisture levels are too high, address the cause. This may include improving ventilation, repairing leaks, or allowing more drying time after cleaning.
If the floor is new, allow proper curing time before painting. Older floors may retain moisture due to trapped water or poor drainage. Once moisture levels are acceptable, prepare the surface with mechanical abrasion and apply the coating system following recommended conditions.
Monitoring humidity and temperature during application helps ensure proper curing and long-term performance.
How to Choose the Right Coating for High Traffic Areas
High traffic floors and walls require coatings that can withstand constant movement, abrasion, and regular cleaning. Choosing the right system helps reduce maintenance costs and keeps the area looking better for longer.
Start by assessing the environment. Consider the type of traffic, whether heavy machinery is used, and if chemicals are present. These factors influence the durability and chemical resistance required.
Next, ensure the coating offers strong adhesion and abrasion resistance. A multi coat system is often recommended to achieve long-term performance. Surface preparation is also key, as even the best coating will fail if the substrate is not correctly prepared.
Routine inspections allow early identification of wear patterns. Reapplying a topcoat at the right time will extend the lifespan of the entire coating system.
How to Prevent Peeling and Flaking Paint on Industrial Floors
Peeling and flaking are common issues on industrial floors when coatings are applied over contaminants or unprepared surfaces. Preventing failure starts before any paint is applied.
Remove existing coatings that have lifted or become loose. Degrease the floor thoroughly, especially in areas exposed to oils or chemicals. Mechanical grinding or shot blasting helps create a strong profile for adhesion.
Ensure the floor is fully dry before applying the first coat. Moisture trapped beneath the coating can cause blistering or peeling later. Follow correct film thickness recommendations and allow enough curing time between each coat.
Routine maintenance and avoiding the use of harsh cleaning chemicals will also protect the coating’s integrity.
How to Improve Adhesion When Painting Difficult Surfaces
Some surfaces, including smooth metal, glossy paint, plastic, or sealed concrete, can be difficult for coatings to adhere to. Improving adhesion begins with understanding the surface and preparing it properly.
Light abrasion helps create a profile, giving the coating something to bond to. Chemical degreasers remove oils and contaminants that prevent adhesion. Once clean and abraded, a compatible primer should be applied to bridge the surface and the topcoat.
Testing a small area first can help confirm that the preparation method is effective. Allow proper drying and curing times between layers to ensure a strong bond.
With the right preparation steps, even challenging substrates can be coated successfully with long-lasting results.
How to Prepare and Paint Exterior Steel Structures
Exterior steel structures face constant exposure to rain, UV, salt, and pollution. Preparing and painting them properly prevents corrosion and extends service life.
Begin by removing rust, old coatings, and contaminants. Abrasive blasting is the most effective method for achieving a clean steel profile. If blasting is not possible, mechanical abrasion can be used.
Once clean, the steel must be coated quickly to prevent flash rusting. Apply a suitable primer to seal the surface, followed by one or more protective topcoats. Ensure each layer is applied under the correct temperature and weather conditions to avoid issues with curing.
Regular inspection and maintenance will prevent corrosion from spreading and keep the structure protected for years.
How to Repair Damaged Industrial Wall Coatings
Industrial wall coatings can become damaged over time due to abrasion, impact, or chemical exposure. Repairing them correctly helps maintain protection and keeps the facility looking professional.
Start by inspecting the affected area to identify the extent of the damage. Loose or flaking paint should be removed using mechanical abrasion or scraping. Clean the surface thoroughly to remove dust, grease, or contaminants.
Once the area is clean, repair any cracks or holes using a compatible filler. Sand the repair smooth and wipe away dust. Apply a primer to promote adhesion, then recoat the surface with the appropriate wall coating.
Blending the edges is important for an even appearance. Allow each layer to dry fully before applying the next. Regular maintenance checks will help catch early signs of damage before they become more costly to repair.
How to Extend the Life of Protective Coatings
Understanding Coating Wear Patterns
All coatings eventually show signs of wear, especially in areas exposed to foot traffic, UV light or harsh weather.
Routine Cleaning
Dirt and chemicals break down coatings faster. Regular cleaning helps maintain appearance and durability.
Scheduled Inspections
Look for early signs of blistering, cracking or thinning. Early intervention reduces long term repair costs.
Recoating Before Failure
Recoating a surface before complete failure prevents structural damage and reduces downtime.
Using the Right Products
Choosing a higher performing system for challenging environments will significantly extend lifespan.